Showing posts with label android phone. Show all posts

Sunday, November 2, 2014

Get Ichabod's Voice Commands on your Waze (Philippines)

Say what? A gross invitation to indulgence?!?

I just found out through CNET that Sleepy Hollow fans can now make use of Ichabod's voice to help you drive safely through the streets of Manila.

Waze Application for Android, Samsung Galaxy 4
To get Ichabod Crane's (Tom Mison) voice on your Waze, all you have to do is open your Waze, tap on the cloud-like icon at the bottom and go to your settings (cog-shaped icon).

Ichabod Crane's voice is now available in Waze worldwide. Enjoy old English phrases as spoken by Tom Mison based on his 18th Century Colonial American era.
Under settings, just tap on Sound. Tap on Navigation Guidance and select English (US) - Ichabod Crane.

And even in online gaming, Ichabod Crane strikes again with a bucket if filthy curse words that sound more adorable than babies and puppies combined.
Read More

Saturday, November 1, 2014

MyPhone A919 Duo: Easiest Way to Root and Install a Faster ROM (Xperia Mizwa Final)

MyPhone A919 Duo Running on Xperia Mizwa (Gaming+Battery Friendly) ROM.
Before anything else, let me list some basic points.

1. You will be expected to download some files from XDAForum and MyPhone A919 Duo User's Facebook Page.

2. You will need internet to download a couple of programs from the Google Play Store.

3. This process will require rooting and installing of CWM recovery before installing any ROM because you might end up getting the message "Signature Verification Failed".

4. You do not need to download any flashing software for this installation. 

Some terms to understand before we start.
  • XDAForums- This is where new custom ROMs are released. Whenever people want to try something new with their phone (e.g. make it look cooler, make it run faster, or make it more customizable), this is where they usually go to download and try new Android OS.
  • CWM (ClockworkMod) recovery- This like a computer's BIOS. It's where the magic happens without having to rely on the phone's stock rom.
  • Stock ROM- This is your phone's original system. Meaning, if your phone was running with unRooted ICS or JB, then that's what your stock ROM is.

Note: Stock ROMs are usually unrooted. This means you can't change their system files and pre-installed software easily. You can't remove the add-ons the company has installed in your phone, and you can change permissions for rooted applications.

  • Root- If you're simply the type who likes to install APKs, then rooting isn't necessary. However, if you're the adventurous type who prefers tweaking your system, boosting your RAM permanently, changing where your applications are automatically installed, or simply into wreaking havoc to your phone, then be my guest.

DISCLAIMER: This said, please remember that I will not be responsible for bricking your phone. And yes, I've rendered a MyPhone useless. It was bricked because I installed the wrong recovery.img. Fortunately, this following procedures won't be as complex.

  • Superuser- This grants an application permission to change some of your system settings. One of the most practical reasons why people install Superuser is to allow a rooted application to do some juju on your phone e.g. remove bloatware or software installed by MyPhone.
  • Boromir- the exploit used to install superuser into your phone. Boromir is probably some character in Lord of the Rings.


1. Procedures in Rooting your MyPhone A919 Duo

1.1. Download Framaroot from the XDAForums. 


Question: Does Framaroot work for all Android devices? The answer is NO. For instance, the Lenovo IdeaPad K1 does not budge with Framaroot. It will simply show you that now exploit is available for it

1.2. Copy Framaroot from the Downloads folder of your computer to your SD card.

Side Note: While you're at it, you might as well download Final Mizwa (Battery and Gaming-Friendly ROM) and the recovery image we will be using.  You might as well copy this two files into your SD card.

Google docs showing the contents of Final Mizwa Z3.zip. Click on the image to view in actual size.


My Google Chrome Downloads tab. Click on the image to see original size.

For backing up files, I manually copied my files from the phone to the SD card. Or you could try Wondershare's Dr. Fone for Android for your images and videos. I used SMS Backup for my messages.

1.3. Assuming you've copied all the necessary files into your SD Card--NOT YOUR PHONE MEMORY (Framaroot, Recovery Image, and Final Mizwa), then disconnect your phone from your computer, and we shall start the rooting process of our MyPhone A919 duo.

Conditions to ensure Framaroot (and the rest of the apps) will be installed smoothly:
a) USB Debugging must be checked. ( Go to Settings>Developer Options> USB debugging) 
b). Unknown Sources must be checked (Go to Settings> Security> (Under Device Administration) Unknown Sources.

1.4. Go to your File Manager and look for Framaroot.  If you saved it directly into the SD Card, then once you tapped into the SD Card, you'll immediately find Framaroot. Install it and open it.

Framaroot will have to editable segments. One will have "Install SU" and the word "Boromir" will also pop out. Don't change a thing, but tap on Boromir.

Once done, a pop-up message suggesting its success will show-up in your screen.

Note: In some occassions, Superuser doesn't show up in your App Menu. No worries, just go to Google Playstore and download it there.

Now that we're done rooting your device, the next thing to do is to install CWM recovery. In this part, I don't suggest downloading ROM Manager because it will simply tell you that it's still going to use the phone's recovery instead of CWM.


2. Procedure on Installing ClockwordMod Recovery and Installing Final Mizwa ROM in MyPhone A919 Duo

2.1. Go back to Google Playstore and download Mobileuncle MTK Tools.

2.2. Install and open it.

Note: There will be instances that MobileUncle MTK Tools require Superuser permissions. Just tap on ALLOW.

2.3. Once the application has opened, look for Recovery Update and tap it.

2.4. Under Recovery Update, locate your recovery.img file under SD Card. It's the file that you copied into your SD Card, found usually under Recovery file in SD Card. Check out the image from CaraKamu's blog.

Now, it should ask you to reboot your phone. Do it.

CWM-based Recovery v6.0.2.8. Click the image to view actual size.

Tada! We're in CWM Recovery.  Use the Volume buttons to move the selector up or down and the Power button to select the highlighted text (the text with blue background). Most people will usually install the ROM without formatting the system. This is fine because Xperia Mizwa does that for us. The following is optional:

2.4.a. Wipe Cache Partition
2.4.b. Under Advance, Wipe Dalvik Cache
2.4.c. Under Mount and Storage, Format System. Then, Format Data. Then, Format Cache.
2.4.d. To be on the safe side, I also do wipe data/ factory reset.

2.5. Select Install zip from SD Card.

Note: As an extra precaution prior to installing Mizwa Xperia Final, Before selecting "choose a zip from sdcard", select toggle signature verification and press the Power button twice. This should give you a message at the bottom. 

2.5.a Signature Check: Disabled.
2.5.b After doing the Toggle signature verification, select "choose a zip from sdcard". If you copied Final Mizwa.zip directly into the main folder of the SD Card (some people call it the root folder), then just locate it and select the file.

Note: Expect to select Yes a couple of times before finally achieving the screenshot below.

Now, we wait...

As you could see, formatting the partition is already done by the Xperia Mizwa ROM. The portion shown above "Installing: /sdcard/Final Mizwa Z3.zip" is done by following items 2.4.a to 2.5.a. Click on the image to view actual size.
And we're done. Bask in the glory of the XPERIA loading screen. 

Yay!!!

Read More

Wednesday, March 5, 2014

How to Root Samsung Galaxy Y GT-S5360 (Newbie Guide with Pictures)

Last time, I discussed about restoring/ resetting/ reformatting your Samsung Galaxy Y. This helps with problems regarding slow android phones and frequent "forced close" apps.

For one, a friend of mine paid a whopping 250 php simply to have her phone reformatted because she couldn't text or call or do anything functional with it. That's a less-than-5-minute process. Others have actually charged her 500 php when all they had to do was do a hard reset/reformat.

So, for my first tip of the day: LEARN HOW TO REFORMAT/ HARD RESET YOUR SAMSUNG GALAXY Y.

Rooting a Samsung Galaxy Y GT-S5360 is actually easier than rooting a MyPhone A818g
Let's get down to business, shall we.

Rooting... Why should I root my phone? (in layman's words)

To be honest, I've barely rooted my phone. And to be more embarrassingly honest, I have bricked  a MyPhone A818 because I was dying to root it. So why do we root?

1. Rooting your android phone can help you adjust the parameters for which your phone is functioning e.g. kill bloatware and manufacturer apps that hog up battery life.

2. Rooting your Samsung Galaxy Y will allow you to install custom roms. Mine, at the moment, is running on ChobitsDigitalis ROM.

3. Rooting gives you that SuperUser icon that looks so cool because it shows you have the briefest idea of what you just did. Oh, and having superuser rights allow you to download the infamous ClockWorkMod/ ROM Manager.

FAQs:

1. Is rooting the Galaxy GT-S5360 difficult? 

No.

2. Do I need to back up my old files? 

In this case, no. They will remain there. 

However, just to be safe, when it comes to tweaking, rooting or installing custom roms, backing-up your files is an imperative.

3. What do I need to root my Samsung Galaxy Y?

a. your computer, to download the update.zip
b. a USB cable to transfer the files from your download folder to your SD card.
c. a Samsung Galaxy Y that has a minimum charge of 50%
d. your concentration

4. If I accidentally install the update.zip more than once, will I brick my phone?

Not to my knowledge. While doing this article, I actually rooted my Samsung Galaxy Y GT-S5360 3 times. Just don't try it for the sake of testing the theory.

5. Will this update.zip work on Galaxy Y Duos?

I haven't tried it (for the absence of a Duos phone). However, I strongly advice for you to look for a Samsung Galaxy Y Duos root instead. 

How do I root my Samsung Galaxy Y?

1. First, download the update.zip.

2. Attach your USB cable to your computer's USB port with the other end on your phone.

USB Connected notification in android phones.
3. Once you see the notification 'USB Connected', just press it and choose "Connect USB Storage". Press "OK" on the next prompt. Your green Android will turn orange and the phone's memory will become visible under 'Devices with Removable Storage'.

Some devices will have another pop-up message before green Android turns orange. Just press 'OK' if this notification pops out.
4. Copy the update.zip into the main folder.

Main folder just means the very first window that opens when you click on 'Removable Disk'
5. Once done, go to your phone again and select  "Disconnect USB Storage".

6. Turn off your phone in preparation for 'Android System Recovery'.

7. Once it's off, press the Volume Up, Home button and Power Button simultaneously. Once the Samsung Galaxy Y logo appears, just let it go  

8. Using the Volume Button as your scroll keys, just press it to go to "apply update from sdcard". Press the "Home" button to choose the update.zip package.

9. Scroll down again to highlight update.zip. Press "Home" again to install the zip.

Select update.zip. If you accidentally placed the zip file in another folder, just select the folder name (the one with a / after each word) and choose update.zip
10. It's a pretty quick process. Once it's done, your phone will have the message on its screen saying: You've been rooted! Install from sdcard complete.

11. Select "reboot system now" and we're done with rooting. You should now see the superuser icon in your menu.

Viola! Now, you've successfully rooted your Samsung Galaxy Y.
And that's how the cookie crumbles, folks.
Read More

Monday, November 11, 2013

Smartphone Usage Statistics Highlight Its Importance In Our Lives

Smartphone Ownership Infographic


This Infographic is produced by Coupon Audit (provides Toms promo code) and Digital Brew.

Read More

Friday, October 4, 2013

What I Like and Hate about Being a Sun Cellular Postpaid Subscriber...

It's probably crazy for me to say this, especially when my last bill amounted to 1,600 php... something far from my anticipated 900 php (650 php originating from my original plan), but I do like Sun Cellular's Postpaid.

Anyway, let's get to the list of my pros and cons on being a Sun Postpaid subscriber based on my first hand experience.


1. Cheap. Getting a plan at 350 php where you have unlimited Sun to Sun calls and texts to other Sun users is simply advantageous to us. Most of us have sun lines so it figures that owning a Sun prepaid or postpaid line is too practical to miss out on.

Just imagine how much you can save when you can call your loved ones with their Sun-to-Sun Unlimited Calls.
2. Detailed Billing Statement. What's nice about Sun's billing statement is it's exact to the point, particularly on call minutes, the numbers you've called and the time you did it. Text, One Time Charges and Give-a-Loads are also included among your sun billing statement. I haven't experienced dealing with hidden charges with Sun before.

This is just part of a typical Sun Cellular billing statement. I like that every single call is logged, as well as, the number of text messages you've sent to the different networks.
I've been a Smart prepaid user ever since I've had my second phone (prior to this I was using Globe services). Prepaid was a lot safer. Then I decided to try Globe Postpaid (back then their cheapest plan included a Nokia 3315 at 800 pesos), after one of my bill ballooned to a whopping 2,500 php (without a trace of its details), I decided to keep daily logs of the number of text messages and calls I made. I listed them all.... 

Then I get another bill that surpassed my tracked usage (I was sure my bill wouldn't reach 1,000 php, but I still paid 2,800 pesos for it). It was crazy. I decided to terminate my plan because they themselves weren't able to give my any detailed explanations either.

3.  Sun Cellular's Loyalty Perks. One of the things I hate about renewing a contract is having to visit Sun Shops over and over again because they don't have the unit you want. Fortunately, if you belong in Sun's Loyalty, customers get to have their new Sun Cellular phone delivered at their doorstep.

It says warehouse inspected. So far, all units have been functioning well.
Note: We just had a couple of Nokia Asha 501's delivered to our house after calling their Loyalty line 1822. What I didn't like was that all their cases were in black... which I guess isn't a big deal.

4. Less Paperwork for Newbies.Most of my work is online. I don't have sufficient documents to prove how much I earn. Of course, I was confident I could pay 350 php/month. So what I did was take advantage of their Postpaid Line with Sim Only. After 8 months (out of 6, which was because I waited for a better phone), I got into Sun's Loyalty program and upgraded my plan to Sun Cellular's Regular Postpaid Plan 450. Now, I'm the proud owner of a robust MyPhone A919.

5. Customized Mobile Number. This is what sets Sun among the rest. I love that customers can select their own number. 

Disadvantages of Owning a Sun Postpaid Line

1. Some of their Agents are Unaware of the Sun Promos. Back when Sun had their Sun Group Plan 999 High and Low Deal, one of the shop agents insisted they didn't have it. We had to convince him to check the website. After confirming it existed, he asked us what unit we wanted. After telling him our preferences, he took out his log book saying the unit wasn't available, which brings me to my next issue.

Note: This goes for their customer agents. One of them, named Tony, told me there was no such thing as a High and Low Deal. After arguing with him that there was was, he finally looked it up and retracted his statement.

2. Unit Availability. I don't know why they always lack Nokia and Samsung units. They already know that most of their customers will always prefer these brands, yet months have passed and they still don't have it. So it doesn't matter if you put your name on the log book. There's a fat chance that you'll still end up with the unit they say they have available at the moment.

3. Getting a Hold of a Customer Service Representative can Take TOO LONG. Calling the Sun Hotline can be a chore. Sometimes, I could hear that annoying song in my head over and over again.  I guess this is because they have a lot of customers (which means that they have to increase their overhead).

4. Area of Coverage. Although Sun Cellular has gone a long way in terms of network coverage, there are still areas in the province where they have limited to zero signal.

Note: We've not yet experienced having a defective phone so I haven't had to deal with the trauma of returning one to them. Hopefully, all our units remain healthy and robust as they are now.

We have a single problem with the Nokia Asha 501. Sometimes, the person at the other line could not hear us when we call her and vice versa. It has happened 3 times already (within a span of 1 month).

Good or bad experiences are welcomed in this post. Please feel free to express your love or hate with your Sun Cellular Postpaid Subscription.

Read More

Friday, June 28, 2013

How to Change Sim 1 & Sim 2 Message Ringtone in Cherry Mobile Flare (with Pics)

 This is a follow-up to one of the questions asked in my post regarding the Cherry Mobile Flare Update
Chilo Chua commented...
Bossing is it possible ba na magkaroon ng magka-ibang message alert tone ang sim 1 and sim 2?
Since I wasn't a big fan of reading manuals, I decided to search for an Android app that could do this. To which I failed in epic proportions!

Well, here's the thing. I just found out about it awhile ago (BY ACCIDENT). LOL. Forgive me for my ignorance.

Anyway, for those who are asking how to change Cherry Mobile Flare's message ringtone for Sim 1 and Sim 2, here it is.

1. Press the message icon to access your SMS.

Feel free to ignore the adorable looking puppy that's enjoying our slippers.
2. Press the highlighted icon (based on the Flare image below) so you can press on the "settings" tab next.

Changing the Cherry Mobile Flare SMS Ringtone Settings Step 2.
3. Press "Settings" and scroll down.

This one's a little blurry. 
4. Under "Notifications" you will find "Select SIM1 ringtone" and "Select SIM2 ringtone"

Finally, a chance to change Sim 1 and Sim 2 message ringtone.
There you can select between Cherry Mobile Flare's music and your own Media Music collection.

Media Music, anyone?

Read More

Thursday, March 14, 2013

Resetting or Reformatting Your Samsung Galaxy Y GT-S5360 Guide with Pictures

Here's another one of my not-so-tech-savvy guide in restoring the Samsung Galaxy Y GT-S5360 to factory settings.

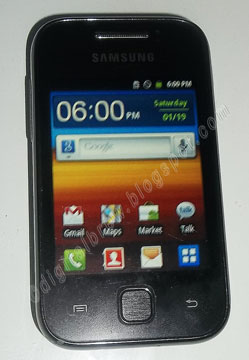
This is how your Samsung Galaxy Y GT-S5360 looked like when you first got it. This also how it should look like once you're done doing a factory settings reset.
The reasons to Reset/ Reformat/ Restore the Samsung Galaxy Y into its original settings may be the following:

1. You want to change the Gmail account used by the phone when connecting to Google Play store. This happens a lot when you weren't the first one to tinker with the phone. For instance, all my nieces' phone use their dad's Gmail account, so restoring it to factory data settings just makes complete sense.

2. You want to resell your Samsung Galaxy Y and prefer all your old data and settings completely wiped out.

3. You installed a program or Google Play Store application that somehow messed up your phone.

There are other reasons why users of the Samsung Galaxy Y would want a reset. However, it's also understandable that they won't go through with it for the fear of the unknown. This blog post is all about showing you what exactly happens when you reset your Samsung Galaxy Y to factory settings.
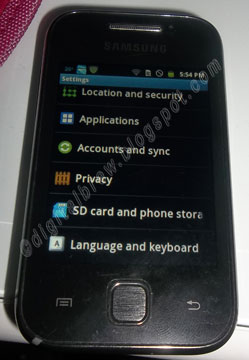
Step 1. Access your phones Menu (that would be the Blue Window-like Square normally on the bottom right corner of the screen) and find the settings.

This is how the Settings Menu should look like.
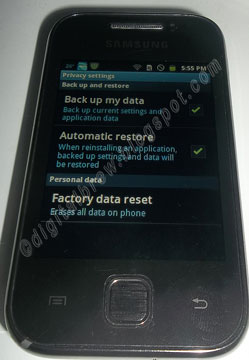
Step 2. Access the Privacy Settings then Factory Data Reset

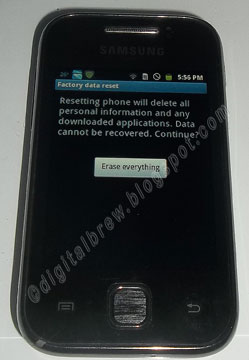
Expect that all your Galaxy Y's data will be totally wiped out except for the data in your SD card (if you didn't check the Format SD Card option.)
Note: Although the reformatting and resetting process doesn't take that long, it's still best to have your Samsung Galaxy Y's battery charged.

Note 2: Just in case you're debating whether to leave the sim card in or not, take it out before doing the reset. Although it isn't affected by the process, it's always better to be SAFE THAN SORRY.

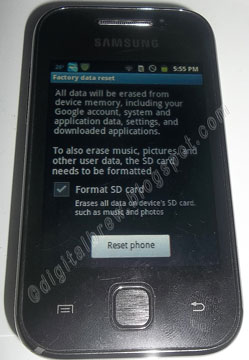
Step 3. You may leave the SD card contents intact by leaving this portion unchecked.

As I have mentioned above, you will be given the option to Format SD Card.

The process of  doing a factory data reset on the Samsung Galaxy GT-S5360 is pretty self explanatory with this picture.

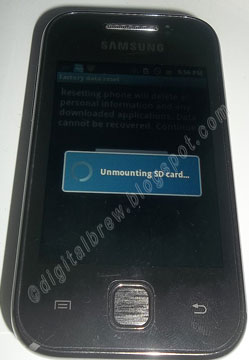
Step 4. Now, we wait....

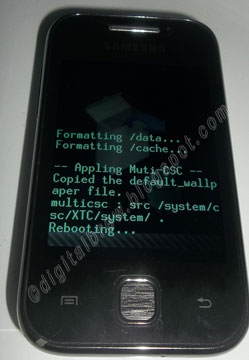
I had the Format SD Card unchecked so the phone unmounted it.

If my understanding is correct, it requires a reboot so that all the processes it was running with will be turned off.

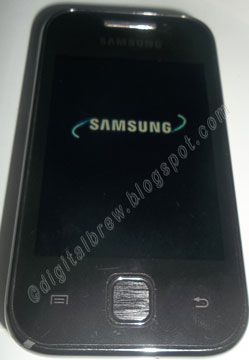
The very familiar Samsung Galaxy Young start-up screen.

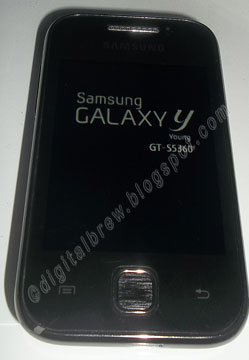
This is the part you won't normally see during normal reboot. Expect this screen to show up if you do a Factory Reset.

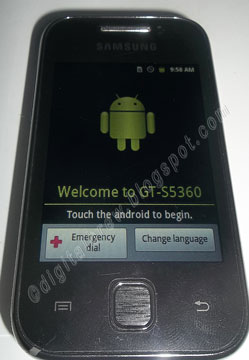
A clear indication that the GT-S5360 factory data reset went through without a hitch.
Step 5. Follow the remaining instructions starting with the picture above and you're good to go. Good luck!

Read More

Thursday, January 17, 2013

Updating Cherry Mobile Flare with Pics (Newbie Guide)

So, we all know that the Cherry Mobile Flare came with a lot of perks...and flaws. For instance, the FM Radio app wasn't present in its initial build. And there were problems with the G-Sensor and SMS Auto-Rotate.

Some hours ago, I found out that the update to fix these Cherry Mobile Flare issues has been released. Of course, everybody who wanted it badly went through Cherry Mobile's link to Drop Box.

Which turned out to be an epic failure...

Note: I just dropped by Cherry Mobile's site and was glad to see that they finally uploaded it there and a Mirror Site (*cough* Drop Box). 

I have to admit, I'm not the sharpest tool in the shed. So even with the simplest instructions quoted below, I still had to do it twice before I got it right.

1. Save the update file to the root of the SD card. Turn off the phone.  Make sure phone is charged at least 15%.
2. Press and hold Power+volume Up for a few seconds. It will display first a green screen.
3. Release the button after the screen shows a red display to show the Android sytem revocery.
4. Select apply update from external storage' and select the update file. Use volume keys to select and power key to confirm.
5. The phone will update. After update is finish, select reboot system now. 
Source
Here's some additional information on the entire process. Hopefully, I'd be able to help others who are in the same predicament as I was.

UPDATING CHERRY MOBILE FLARE STEP 1 FAQ. Where the hell is this root?

After tethering your phone to your PC, this message should pop out.  Once you click on "Open device to view files", that folder will be the root.
Note: USB mode is expected to be on MTP.

Flare will have the label S100. This is where you're supposed to copy the file that you just downloaded from Cherry Mobile.
UPDATING CHERRY MOBILE FLARE STEP 2 WARNING. Make sure to read all the steps before doing the procedure. I let go of the buttons at step 2 reason why my phone didn't go red as mentioned in Step 3.

UPDATING CHERRY MOBILE FLARE STEP 3. Once your screen turns red (mine was reddish pink than red), that's when you should let go. Now, wait for the screen shown below to appear.
Use the volume key to navigate your way to "apply update from external storage" and press the power button for confirmation

UPDATING CHERRY MOBILE FLARE STEP 4. If my memory serves me right, you'd still need to look for the msm7627a-ota-TBW59.... item (which will probably be the first choice on the next screen) and confirm.

UPDATING CHERRY MOBILE FLARE STEP 5. The phone will update.

Just like this...

Once you get the "Install from sdcard complete." message, just select  "reboot system now".

When your phone is  done rebooting, you should see something like this on your "About phone" menu.

Finally!
I hope this has helped. Please take note that I am no Android expert. Heck, it took me two tries before I got it right. Good luck!

Read More